
How to Draw a Realistic Cat

Many of us enjoy learning portrait drawings. However, Have you ever wanted to draw a fur animal, like a realistic cat? If not, then here’s the chance to learn from the best online drawing classes. Today we share with you a detailed step-by-step art tutorial on How to draw a realistic cat! You can follow along with the given stages and draw a realistic cat yourself. Also, one can apply the same methodology to draw a cat of any breed in any pose.
So Let’s begin by first understanding 3 important things.
- Understanding the anatomy of a cat,
- Discussing the cat reference we will be drawing today
- The materials required for this tutorial
Understanding the anatomy of a cat
The best way to draw any animal is by understanding its anatomy. A cat has large ears, eyes with vertical pupils, sensory whiskers, sharp pointed teeth in the mouth, retractable claws with padded feet, a tail, and soft fur all over her body. Next is to understand How a cat moves, acts, and poses. If you have a cat, do some rapid sketches of its motion and understand. If you don’t have a cat, you can find many real cat references to practice with. While sketching does not think of making it realistic but considers this practice as a part of learning. Scribble gestures, angles, positions, or any specific part such as paws or just the face. This will help you gain confidence about the subject, and learn its structure, names of the structure, and specifications of various breeds too!
Discussing the cat reference we will be drawing
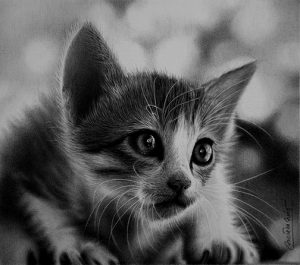
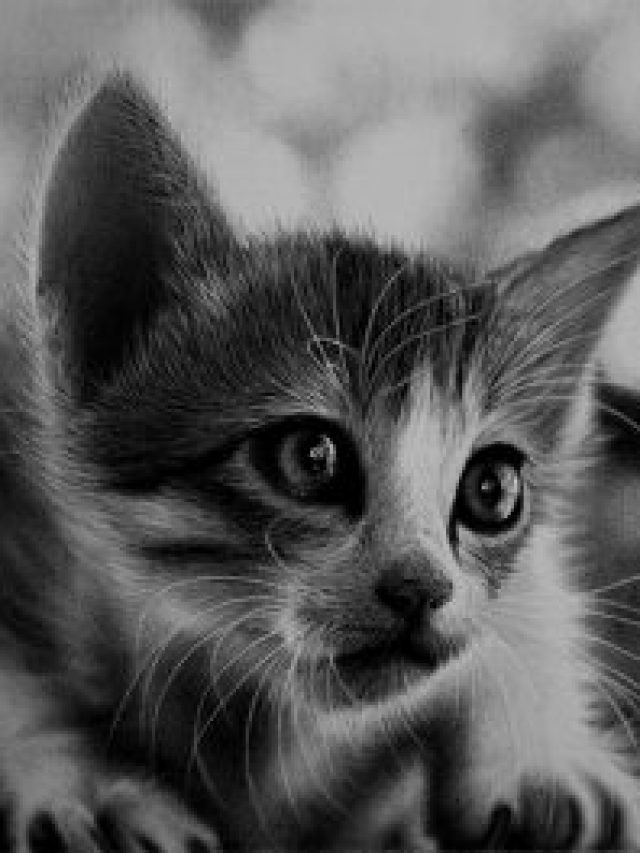
The photograph used for this tutorial is that of a stealthy cat.
Cats are excellent hunters who love to hide, stalk, and pounce. Seeing this reference, makes us feel as if she is Ready to Pounce! This photograph was clicked by my friend, ameya. I love this photograph white captures the expression, posing with an apt depth of field. While drawing this cat, we will learn a lot about rendering techniques, types of edges, tonal transitions, and the bokeh effect.
Materials Required for this Tutorial
This drawing is made using the following materials, in case you do not find the exact materials, It’s alright! Just make sure the available materials have the desired requirements.
- HB graphite pencil to draw
- 2B, 4B graphite pencils for lighter tones.
- Staedtler 8B or Any Dark charcoal pencil. You can also use Generals.
- Kneaded eraser (any brand)
- Medium size Soft brush (optional)
- Sharpener (use any medium-size brand)
- Pencil Extenders (if needed)
- Butter paper (to keep beneath your hand in order to avoid damage due to hand moment)
- Fabriano Accademia 200gsm Paper or Strathmore Bristol Vellum 300 series paper. If you do not have any of these, you can use any paper that has medium size grainy texture. The Vellum surface will work, too. The gsm(thickness of the paper) must be at least 120gsm
- Print of the Reference photograph, a black and white quality print helps you to draw accurately and compare the tones at a distance. (Optional yet important for self-critique)
Once all these are arranged, we are ready to start with our cat!
Let’s get started with the process! I am sure you’re going to learn a lot from our drawing tutorials
Step 1:
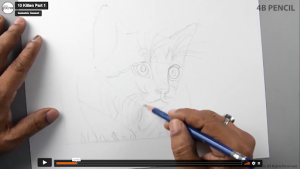
- To draw the cat we will first draw the envelope of the cap as shown in the reference here. We have to first accurately draw the green line
- Now draw the basic structure of the cat and the remaining details of the paws, nose, and bokeh circles.
- Carefully mark the highlights and Dark shades accurately.
- Add the whiskers last, the whiskers are slightly thicker and darker at the base near the nose and become thinner and finer as they end. Now sit back and compare your drawing with the reference and check its accuracy. Our brain can only remember one thing at once, so be slow. Don’t be tempted to get rid of the drawing process fast and start with shading. Observe and spend time critiquing your drawing and work on its accuracy.
Step 2 :
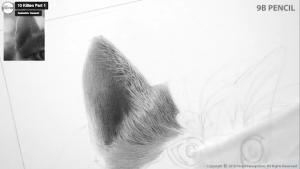
While outlining, Add little fur markings in the direction of the body movement. Then Squint your eyes and see the reference. Understand the transition of tones and shade the base layer on which we would be adding the fur texture. Usually, we skip this due to your artwork doesn’t look realistic. After the base layer, we will be creating the fur texture by either using a pencil eraser or simply by erasing some graphite off the fur areas and using a sharp pencil to refine the erased strokes in the direction of the fur. Lastly, as we create these textures, we will be adding one more layer and blending the area as needed. If you wish, practice this trick and make a small part roughly to see the results. This will bring in confidence and help you apply this process as per your needs.
Now we will start with the ear of the cat, Add a base layer using 2B and 4B in the vertical direction as per the curve of the ear. The next step is erasing and creating the fir using a kneaded eraser. Once you have pulled off the graphite, now use a sharp 2B pencil and carefully define every fur seeing the reference. Do not end up making a repetitive pattern in the fur. Make it random and balanced.
Step 3:
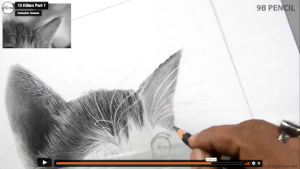
The Fur has both light and dark lines, so you can add the dark parts using a sharp pencil and erase them wherever needed. The other ear will be done in the same way, this image shows how the base layer is rendered before the fur texture.
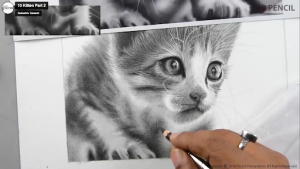
Step 4:
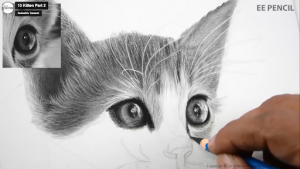
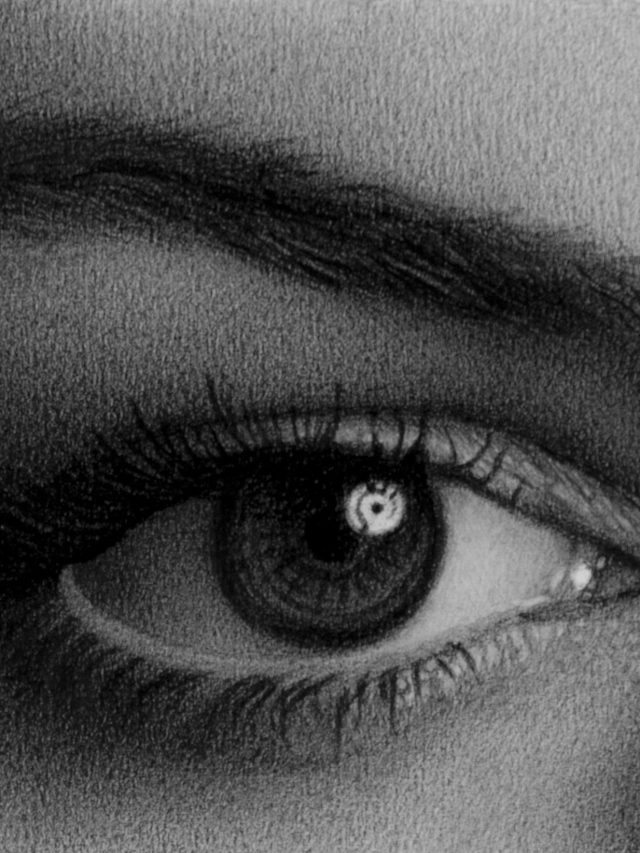
Now comes the most attractive part, the eyes! Use the darkest, preferably a charcoal pencil, to make the outside area of the eyes and the pupil(center of the eye). Keep the highlights in the eye as it is, in case you couldn’t, you can use a pencil eraser in the end to enhance it. Use 2B for the other areas of the eye. Add more layers of 2B where you want it to be darker as in the photograph.
Step 5:
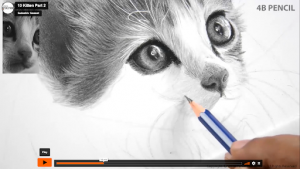
For the nose, use an 8B pencil for the nostrils and the bottom center part. Use a 4B for the other areas. To render the texture in the triangular area, first, create a base layer using a 2B pencil. And then just use a sharp 4B pencil to create the small fur texture. Do not use an eraser for this area. You can use a brush to merge the tones in this area lightly. Do not overuse the brush.
Now we head towards the whisker pads and the cheek area where we will be shading in a horizontal direction as per the shape of the cheek.
Step 6:
Keep the whiskers as it is and blend the tones and create the fur texture by understanding the direction as seen in the reference photograph. Take as much time as it takes. It’s not necessary to replicate the reference. Your main aim needs to be understanding and strong application of the process!
Step 7:
In this step, we will be focusing on understanding another new thing. Take the reference in your hand, and now carefully look at the photograph, we see a depth of field in the other areas apart from the face. This shows that the edges of the body and the paws and the background have Soft edges instead of sharp edges. So in the further steps, we will make sure that there are no sharp edges and sharp details, instead, we will focus on accurate tones and blending of tones.
We will be using a 4B to make the paws and the rest will be using HB and 2B pencils.
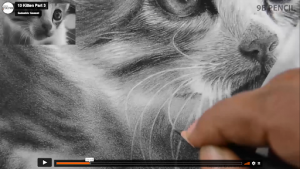
Step 8:
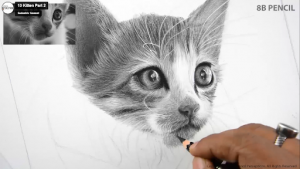
In this step, we will be focusing on capturing the fur effect in soft tones just by adding darker tones using 4B and 8B pencils. Just make sure the dark areas are not as dark as one’s in the cat’s face. Round strokes can make the process easier for you!
Step 9:
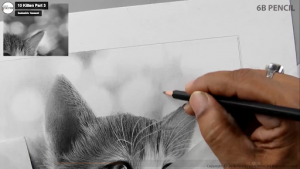
At this stage, we are almost done with the cat, now we will be drawing the bokeh effect in the background and blending them. Notice that the edges of the bokeh are not sharp edges. Using an eraser to make the bokeh is not necessary as the edges need to be soft. Just shade using straight strokes with an HB pencil.
Step 10:
Woohoo! We’re almost there! Guess what’s missing? It’s the whiskers and feedback session with oneself. In this step, Let’s make the ends of the whiskers thin using an extremely sharp HB pencil. We need not make it look like an outline of the whiskers but make it look natural by matching the tones around them.
Step 11:
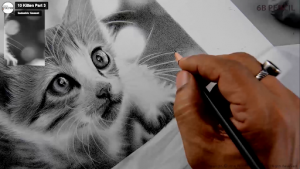
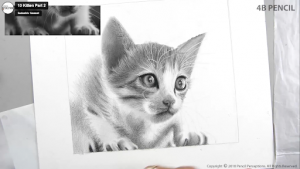
Let’s shade the background dark on the right side which will make the paw and the cat stand out, you can use 4B for the same.
To give feedback to yourself, Place the photograph print and the artwork side by side and stand at a distance to observe every area carefully. You will automatically find areas of improvement. Note them down and work on them! Bring the best out of you.
You’ve made it! Great job! It’s time to add your signature and spray a fixative and share it with your friends!
You need to practice this several times to master it. If you would love to learn more about the fundamentals using professional methods, You can check our online sketching course has detailed process videos with simple, crisp explanations and Feedback support!


