
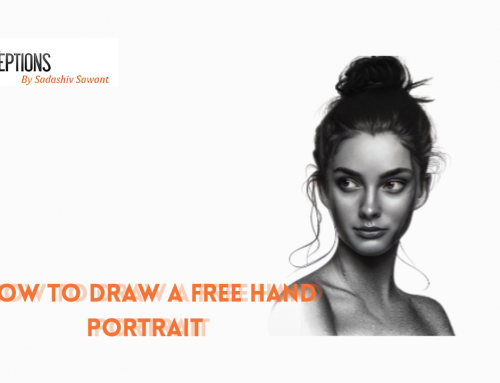
Learn to Draw a Face with Simple Technique

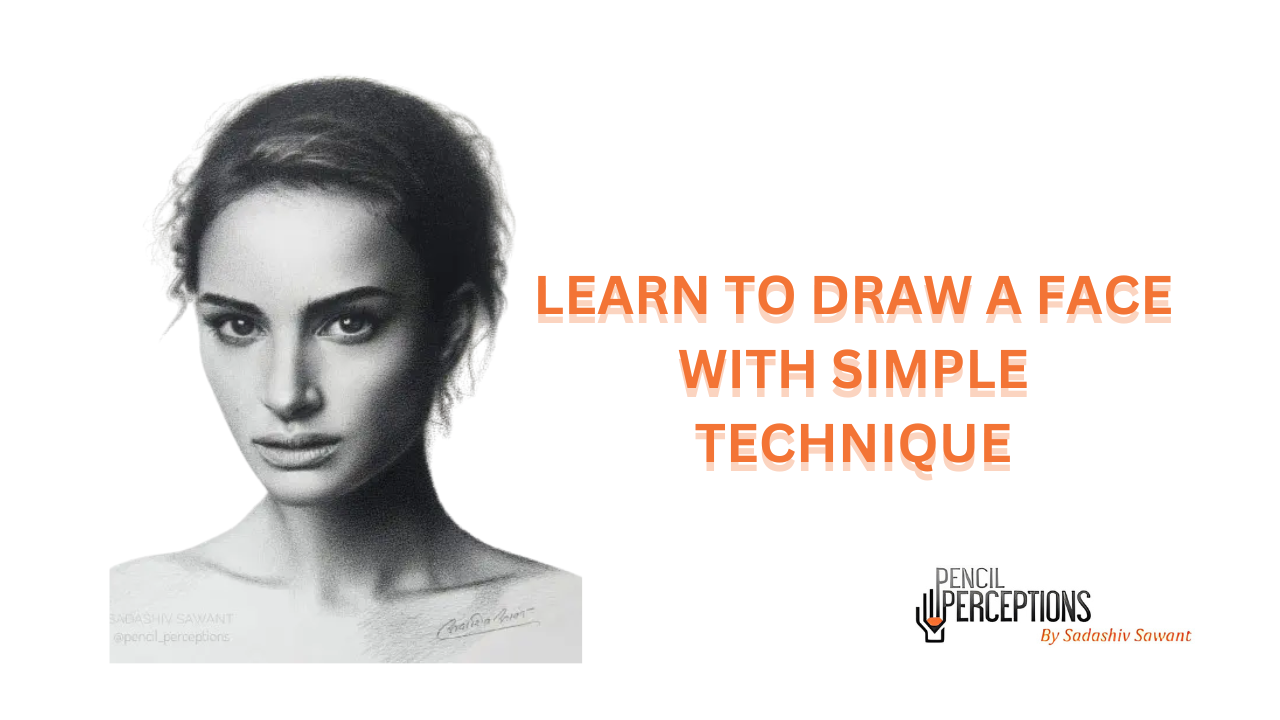
Most of us wish to learn to draw a face as it’s one of the most important skills of every artist. It can be accomplished in various ways such as realistic portraits, cartoonistic styles, and graphic novel-based sketches. You might be able to learn to sketch basics as a beginner but you need to follow all the art technicalities to master the face portraits. In this blog, you will learn to draw a face with simple line & shading techniques. We’ll also discuss about a top notch online class for drawing that will be of great benefit to you
1. Outline the Face
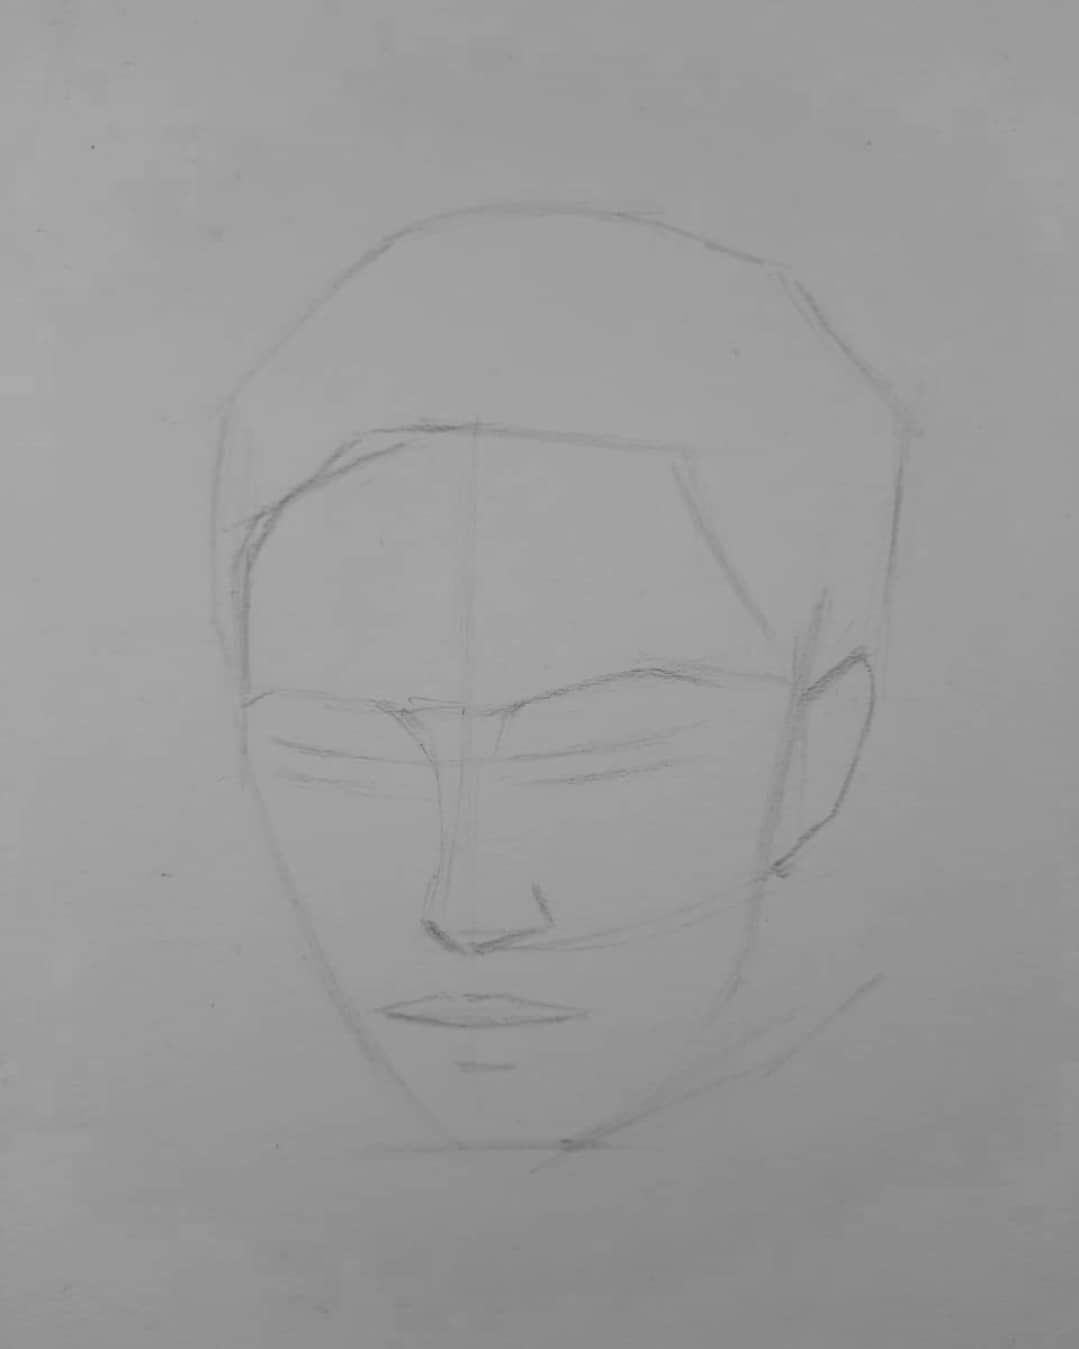
Outlining the face is a first step if you are planning to learn to draw a face. It acts as a supportive base for drawing. Mark the proportions from beginning to end of the drawing paper that will occupy the space for drawing a face. Learn to draw a face by drawing a line horizontally using a ruler at the top, bottom & middle part of the drawing paper. Draw two lines vertically starting at a 1-inch distance from the top horizontal line & ending at the bottom horizontal line. It will create a square. In the outer region of the square’s external field, you have to draw a circular shape curve in the upper half where you have to drag the two vertical line curves towards the middle region. Draw two curves in the lower half section that’s beneath the center square starting from the sidelines & then drag them towards the lower horizontal line.
2. Add the Facial Features
Learn to draw a face in this step, by adding different facial features. Let’s start by creating a hairline for further work. Focus on drawing the topmost part of the circle by staying within the lane of the original curve. Starting from the middle horizontal line, you need to draw a ¾ rough dot line in the upward direction. It will help in easily drawing the ears where you will be able to understand the top & bottom of the ears. Draw a curve downwards on two sides of the face reaching the middle portion of the cheeks. Complete the inside part of the ear by drawing a couple of lines & oval shapes.
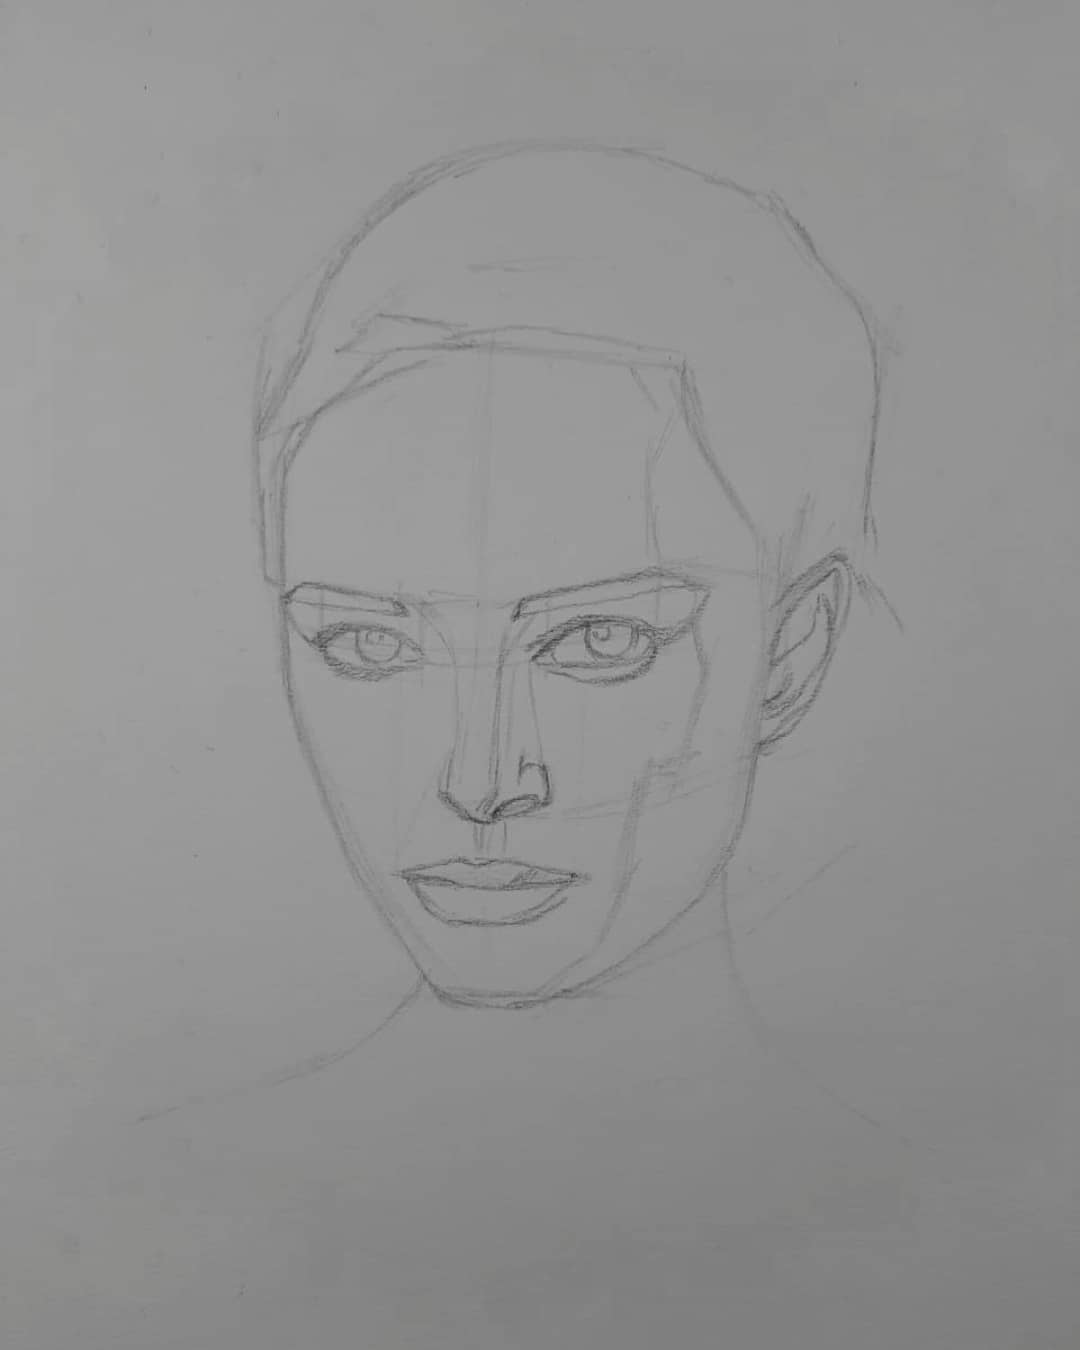
3. Mark Guidelines and Begin Drawing the Eyes
Learn to draw a face by drawing five guideline rectangles near the middle horizontal line. Create the oval shape overlapping the middle line within the 2nd & 4th rectangle. Draw a big & a small circle inside every oval shape to create eyeballs. Draw a curved line over these ovals that will represent the topmost part of the eyes. Above the guideline rectangle, draw curved eyebrows & below the rectangle, outline the nose by sketching the curved lines. Shade the eyeball circle using the dark shade pencil.
Achieve the glassy effect by erasing the few tiny spots in the pupil. To achieve a 3D realistic effect, slightly shade the eyes’ corner part. Start shading the eye’s outer region & continue shading where the eyebrows end in different shades of dark & light tones. Draw eyelashes afterward by drawing lines at the eye’s upper & lower region. Use the dark shade mechanism towards the inner side areas of the eyebrows & apply light pencil strokes towards the outer edges. Learn to draw a face by ensuring to create thicker eyebrows near the nose to achieve 100% realism in your face portrait.
4. Finish the Nose
Carry on the shading process starting from the eyes of the face portrait following the nose tip outline & the center guideline. Create the nostrils by gently shading the tiny nostril ovals. Give the shadow effect in the left & right region of the nostrils by using the light pencil shades following the center of the nose. Use an eraser on the middle region of the nose to create a shiny effect in contrast to the shadow effect created by you.
Ensure that the pencil shading on the right region is much lighter than the left region as it will bring a perfect realism in the nose. Jump back to the light outline created initially for lips & teeth. Use a light shade pencil for shading the lower part of the upper lip following the direction of the upper part of the upper lip. Use the dark shade pencil for shading in between the teeth & bottom lip. Shade it around the lip’s edges & start shading in the light tone while going towards the middle lip. Learn to draw a face step by step by creating plump lips. Here, you have to draw darker lines at the end starting from the middle lips & going towards the outer region.
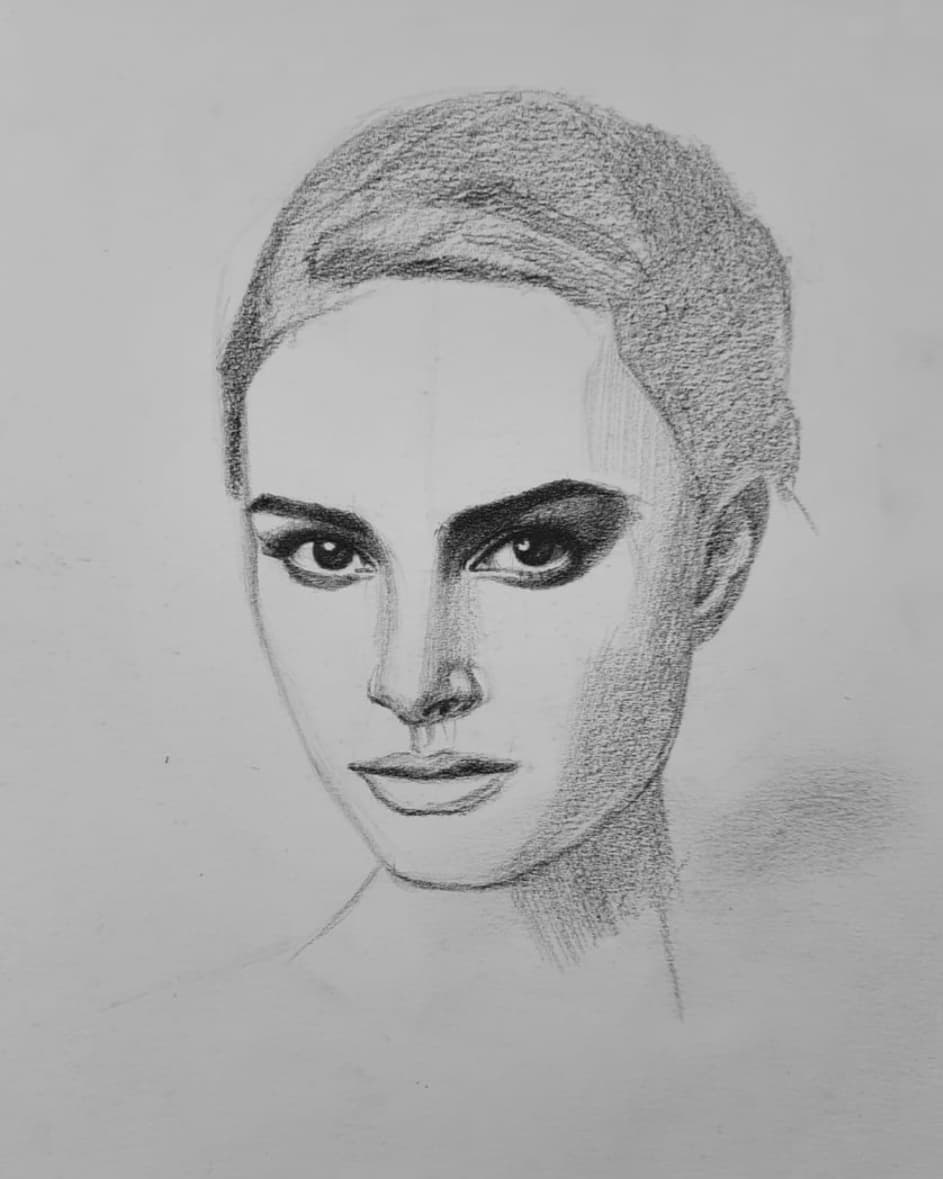
5. Complete the Skin Shading
You can learn to draw a face by diligently following all the above steps. Choose the left & outer center region to continue the final shading process. Use the darker shade pencil in the outer layer of the face and use the light shade pencil as you reach the eye center region. Continue shading lighter following the uppermost outer edge direction till the left eyebrows. Understand the fact that if you wish to learn to draw a face, you need to have a clear understanding of shades & tonalities.
There should be lighter shades near the middle right forehead region & top center area of the face. Perform shading from the left region to the right region while moving towards the neck area. Note that there will be dark shades for three-quarters of the neck followed by a light shade triangle in the right part. To showcase the natural fall of a light, you need to shade the inner region of both ears. Learn to draw a face by ending the drawing with the curved lines from the head’s center towards the face’s center.
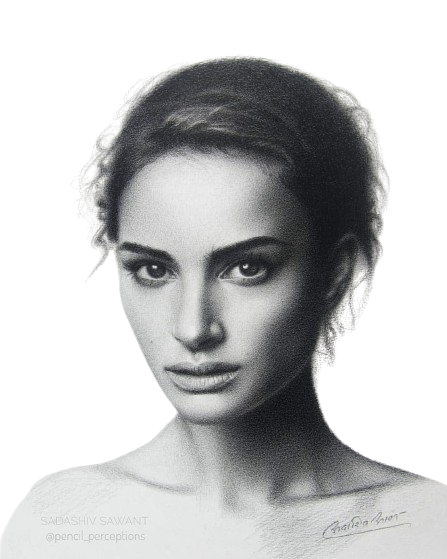
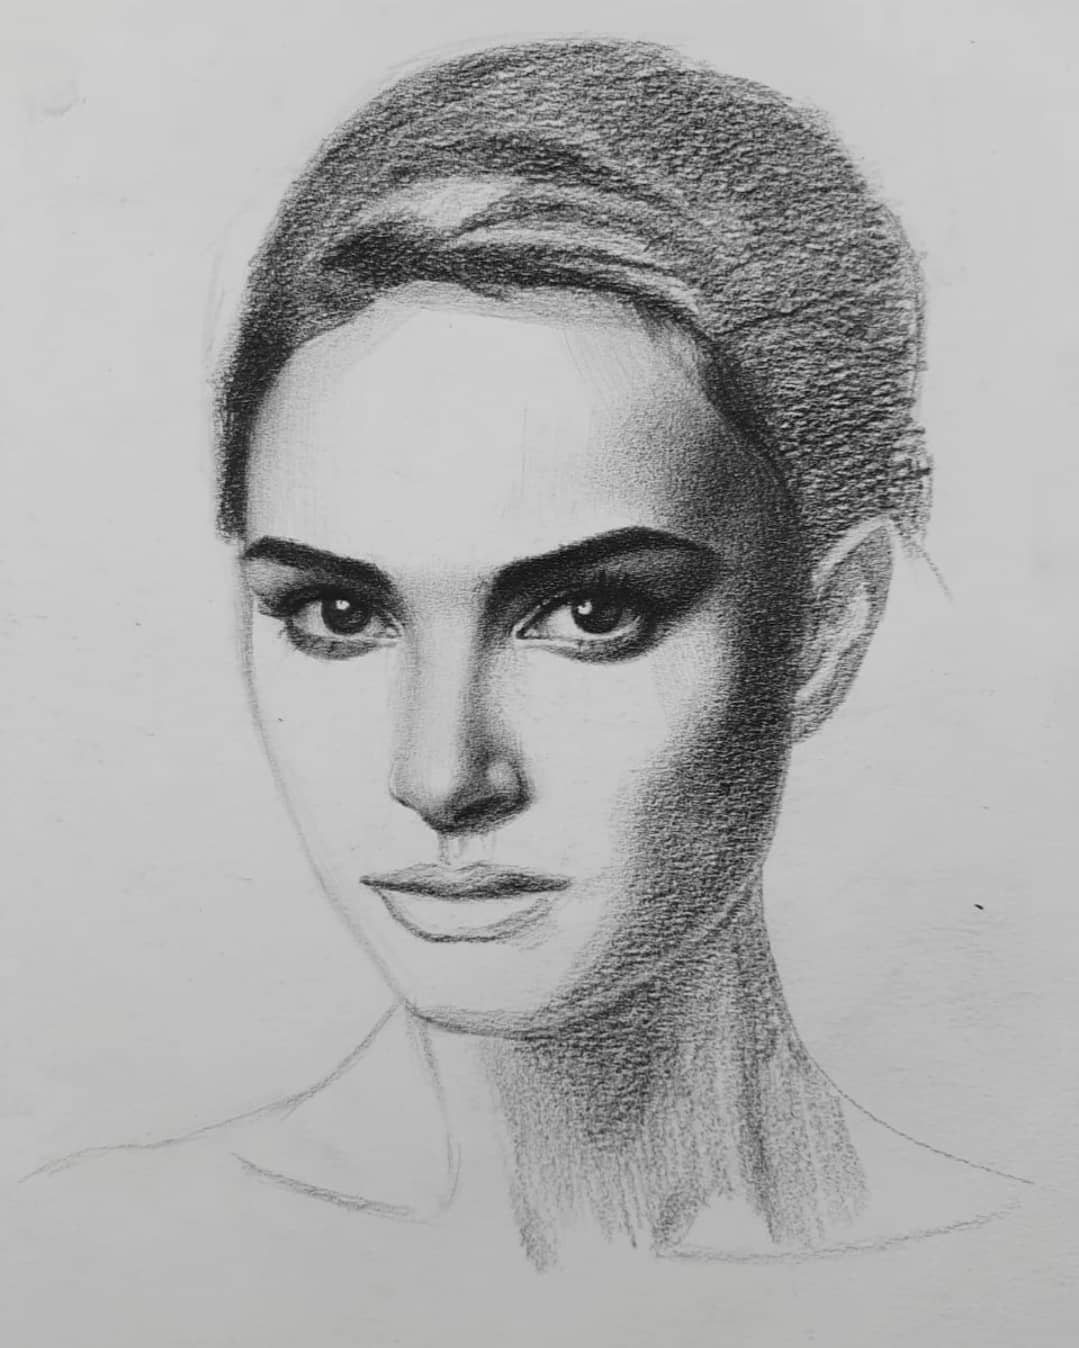
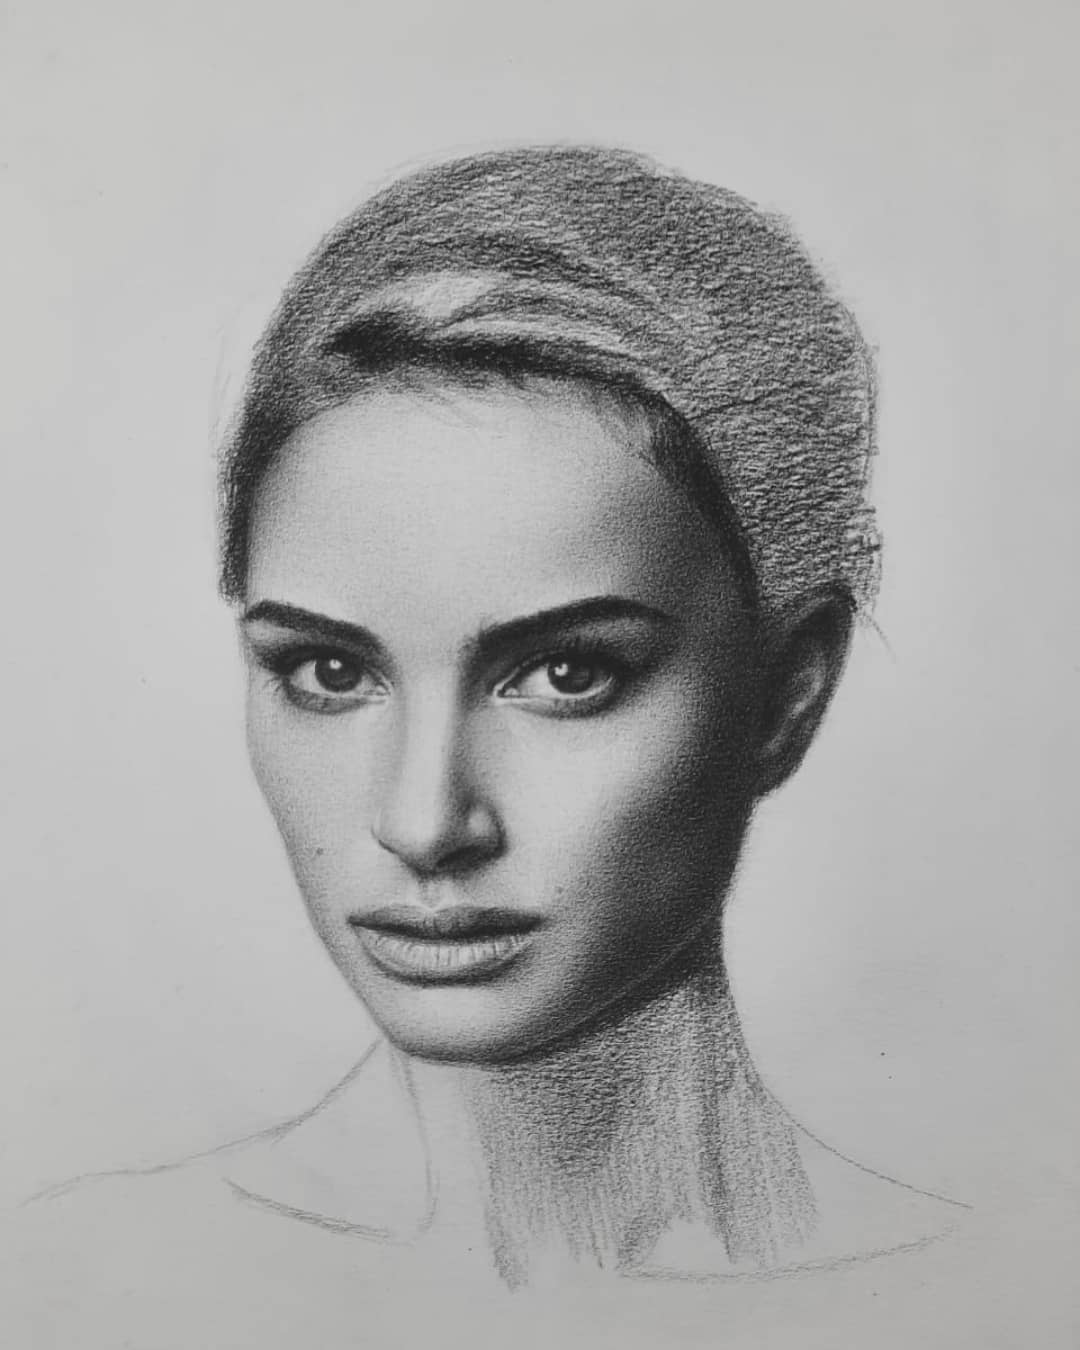
We hope that the above step-by-step guide helped you learn to draw a face technically to achieve utmost perfection. Well, this was one of the illustrations for art enthusiasts who wish to learn to draw a face. Our expertise offers you the best online course for drawing. We have covered plenty of topics if you want to learn to sketch from celebrity portraits to drawing your faces in our online class for drawing. Expertise & guidance provided by Sir Sadashiv Sawant in our online class for drawing is more than enough for anyone to become an art perfectionist. Join our online course for drawing to master intricate details, art technicalities and to be able to make realistic artwork.


