
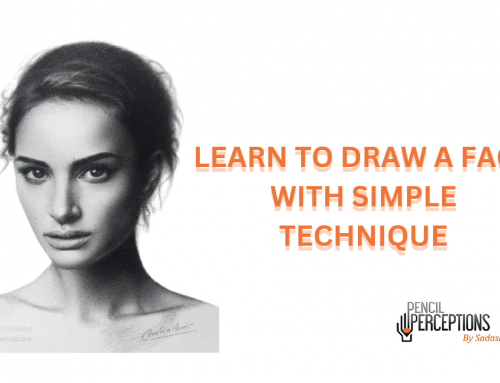
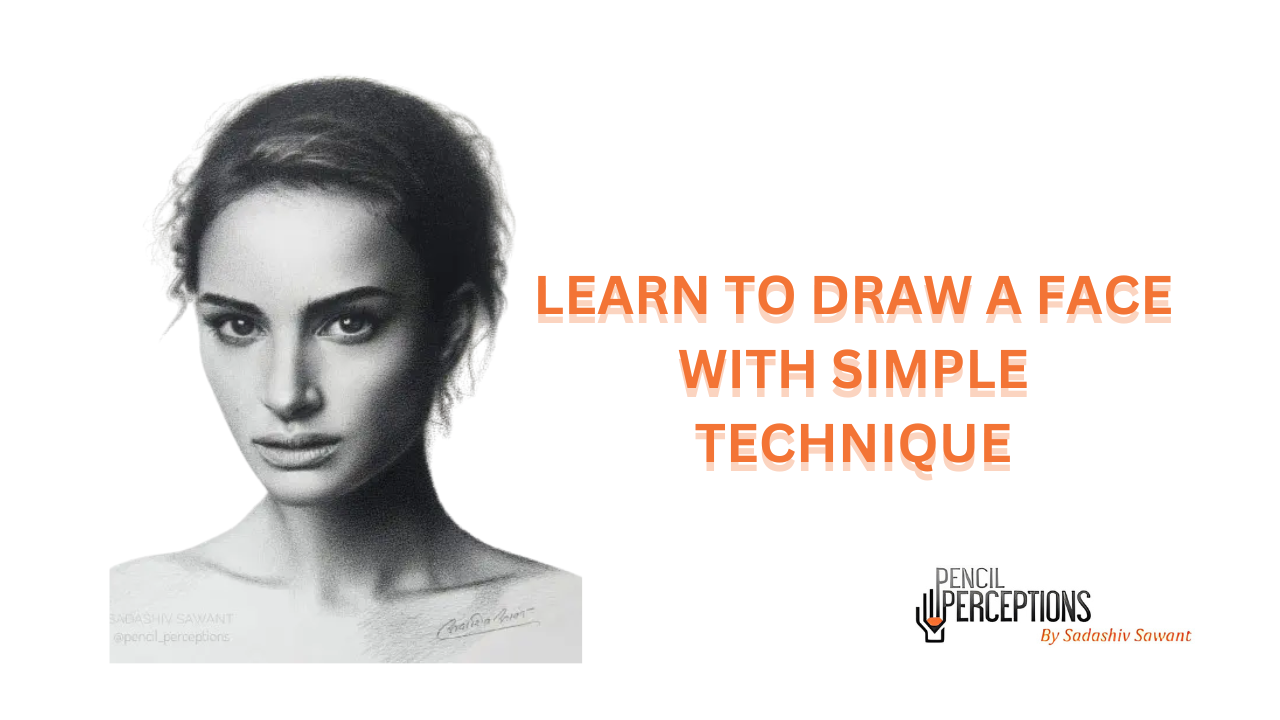
Step by Step Drawing Tutorials – How to draw a free hand portrait

With the excitement of making a free-hand portrait, you might feel chaotic about how to draw & from where to start, especially when you are a beginner. This is when a top notch Portrait Sketching Course comes into play. The caliber of creating portraiture for an experienced artist might vary from the newbie artist. But, what remains the same is dedication, techniques & use of artistic technicalities. Measurements, angles, features, shapes, proportions, and lengths are vital in free-hand portrait drawing. In this blog, you will learn the drawing tutorials on how to draw a freehand portrait.
Tips on How to draw a Freehand Portrait
Here are the tips on drawing a free-hand portrait –
-
Structure:
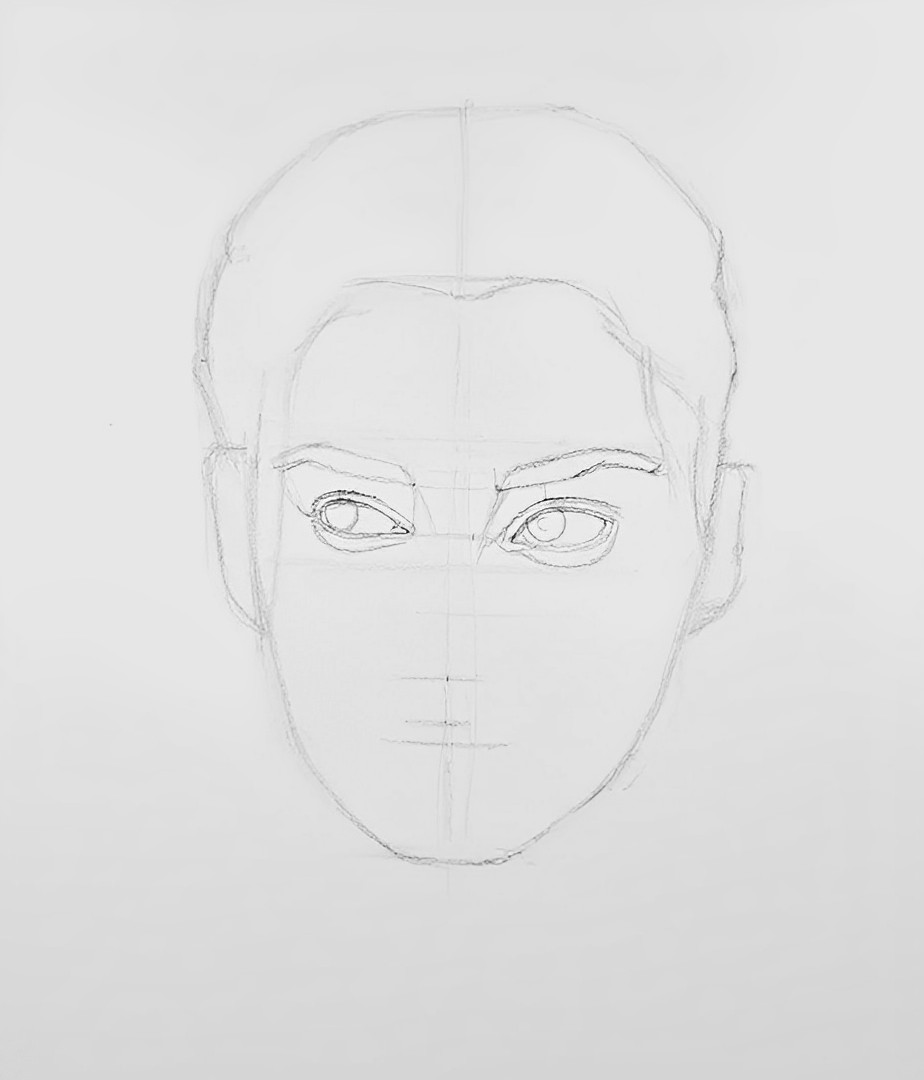
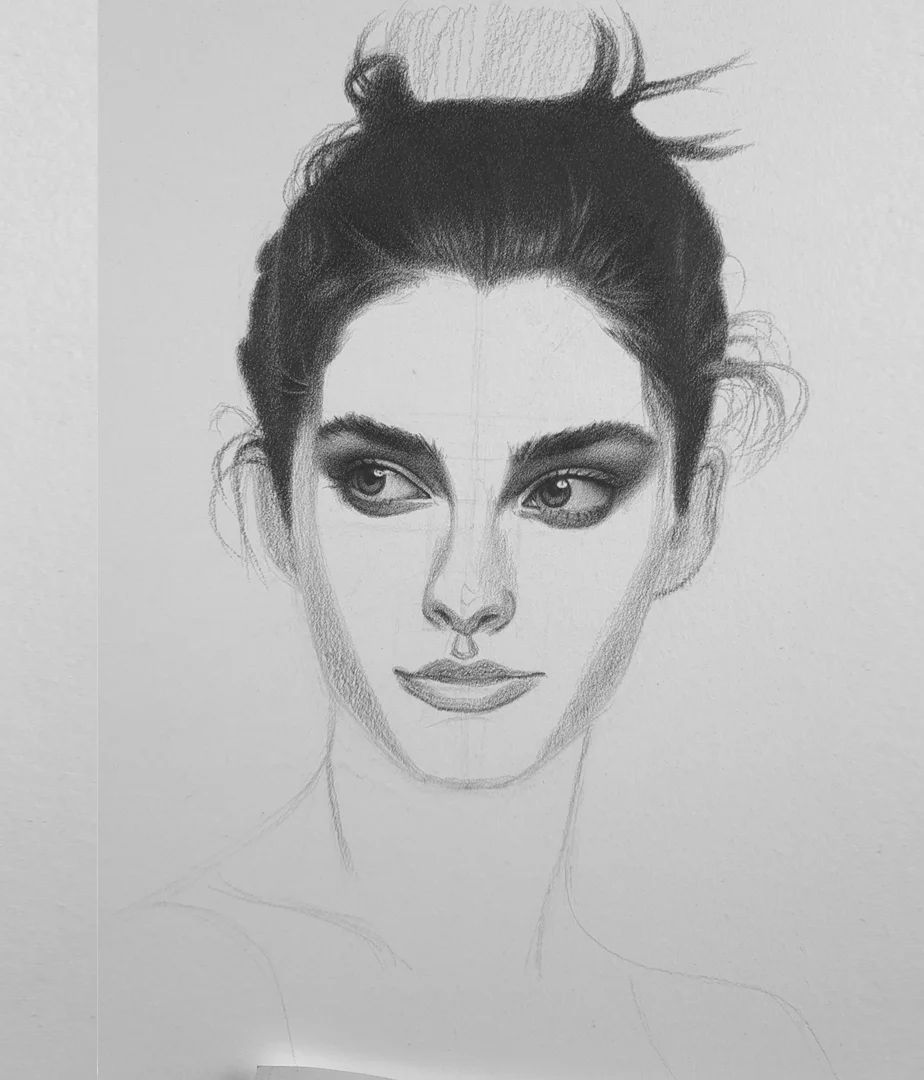
Take an in-depth look at the shape of the face whose portrait you are going to draw. The shape can be oval, diamond, heart, rectangle, etc. Draw the dummy face structure with the intended shape using a light hand pencil.
Remember that the proper shape defines the realism of the final results. A sudden change or any mistake in drawing the correct structure might destroy your freehand portrait.
-
Features Addition:
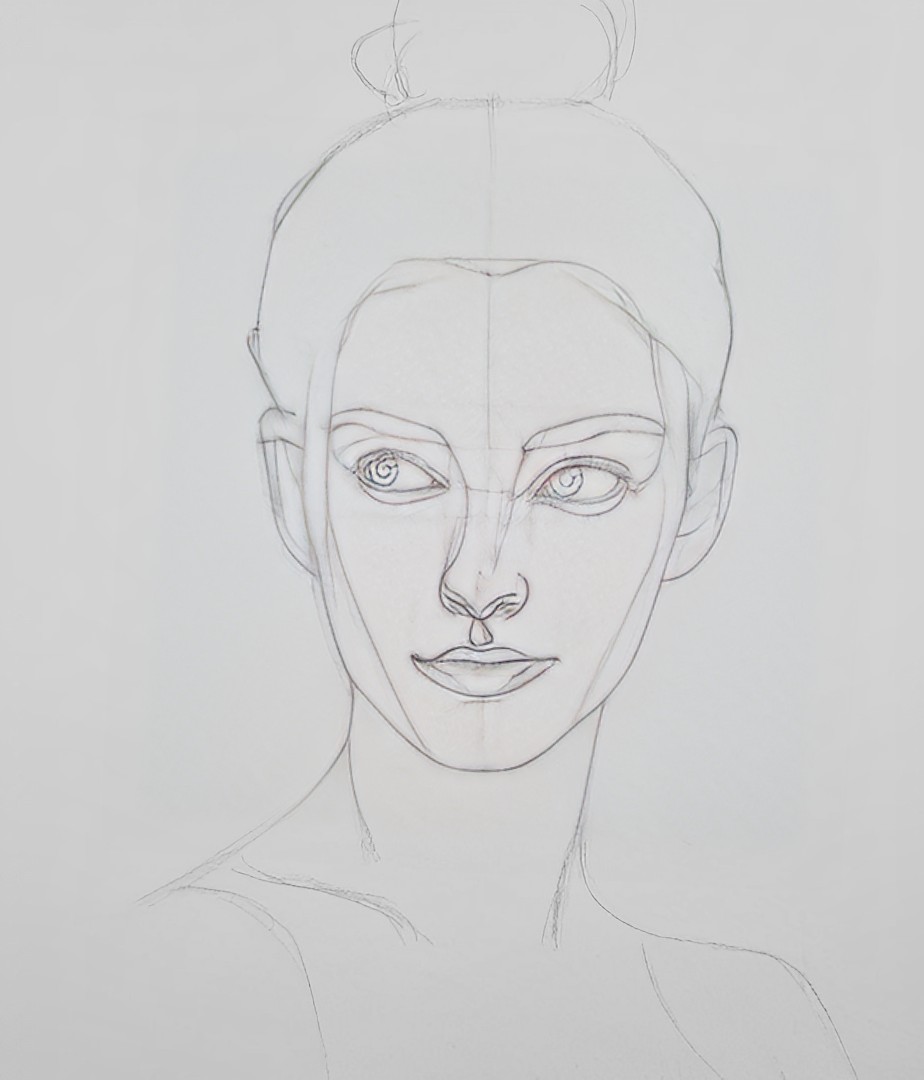
With the help of proper judgment, you can place the features the right way. Use the free hand to roughly draw the main features like the nose, eyes, ears, lips, etc., using a pencil.
Make your judgment wise by noticing detailed features in the picture like a broad forehead, heart-shaped lips, almond-shaped eyes, slim nose, etc. It helps highlight such features later to give a realistic look.
-
First Value Layer:
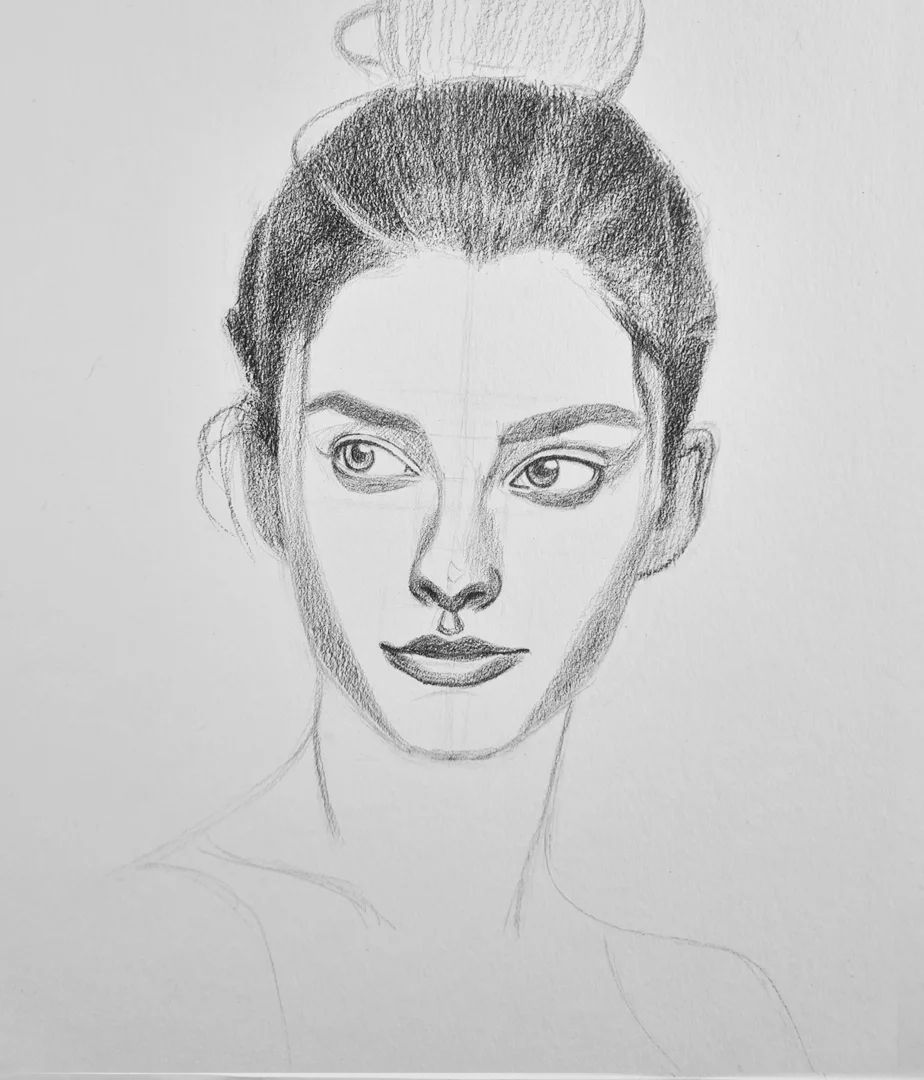
Use the first layer of value to create multiple other layers. There should be a perfect balance between the highlighted part & the dark value parts.
Darken the surface gradually as per the need in the first layer. It will eventually help you take a step towards the perfect freehand portrait where the veins, blood & flesh of a face are shown wisely.
-
Adding Values:
Add the required value to get close enough to the subject. Also, you need to be quite patient at this moment & make sure to take things ahead slowly. Else you might overdo everything & get away from achieving the desired results.
Pay special attention to the hair part. Use mid-tone while shading hair & it will lead you 40% closer to the subject. It’s advised to use a kneading eraser to add randomness & realism to the follicles. Don’t try to go strand by strand, as it will only consume time, leading you nowhere.
-
Final Highlights:

Highlights possess importance like no other! Even after completing the portrait, you have to highlight several parts consistently. The highlighting element of the picture gives life to it, making it look 100% realistic as if it’s the accurately captured picture of the person. There are two types of highlights in portrait painting.
The first highlight is one that completely merges with the portrait’s skin, and the second highlight is the one that bulges out of the skin. The second highlight that appears to look outside the skin is a reflection of light. Our skin is the best reflector of light. It is the same light captured by the portrait when some random light from the light source falls on the subject.
With creative capabilities, an artist creates realistic freehand portraits. The more natural it looks, the more artistic technicalities are required behind it. The best Drawing Course For Beginners by Sir Sadashiv Sawant answers all the questions on how to draw accurate portraits or anything for that matter. He is well recognized as the top-notch provider of drawing tutorials available through online & offline classes.
Please look at the clear demonstration of freehand drawing on our official Instagram page. It will help you better understand the steps & intricate details behind the final portrait.
Also read: 6 Amazing Drawing Tips on How to Draw Anything Accurately


